An unanticipated Easter treasure hunt
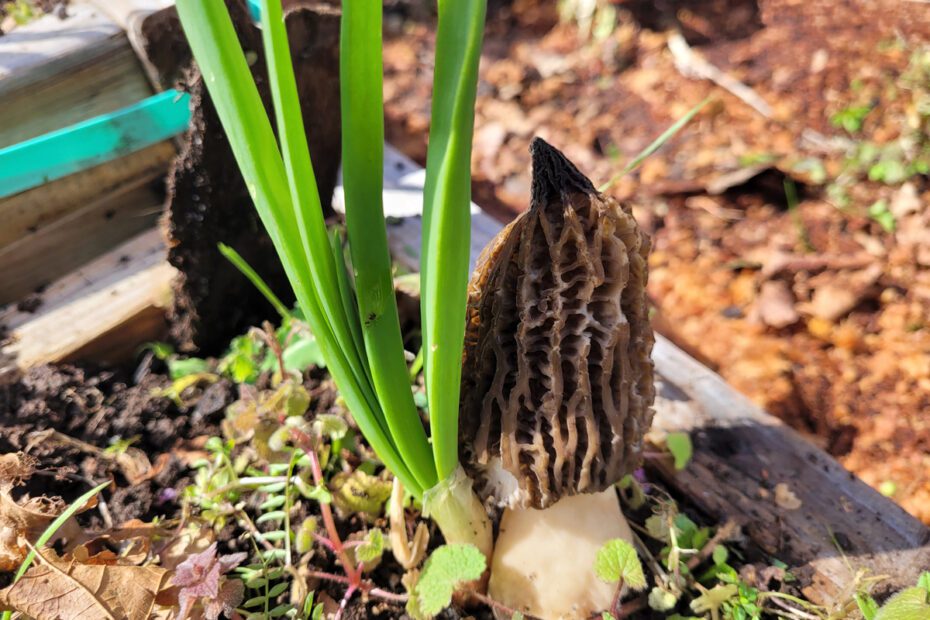
On Friday while weeding the garlic beds, we discovered fresh morels! First, I saw one perfect black morel beside a garlic stalk. Then, three more in the box right beside, and two more nearby poking through the weeds. The opportunity for a special treat of our own morels sautéed on toast for breakfast was exciting enough in itself, but then we noticed more. Literally, a morel garden.
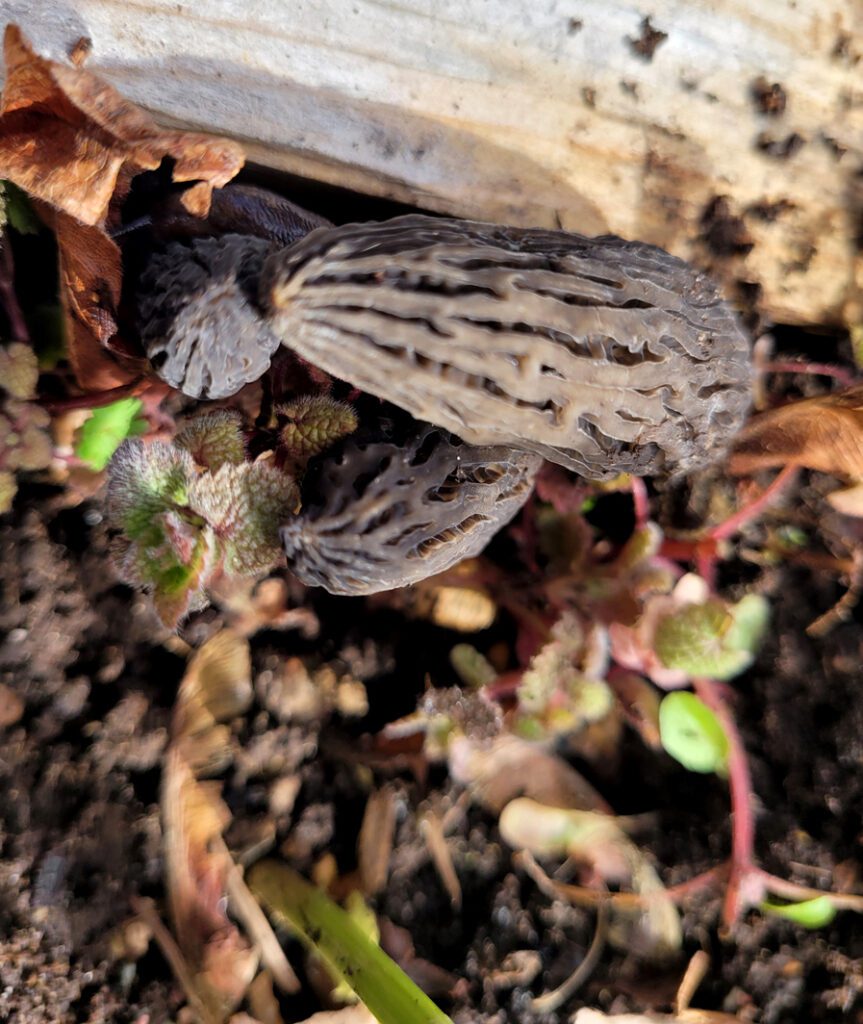
In addition to the original six morel mushrooms spotted, there are dozens of small mushrooms. Most are tiny, but if all grow to maturity, there are several pounds of morels on the way. I could easily understand the traditional mushroom forager’s wisdom: “Look for the morels when the oak leaves are the size of a mouse’s ear”. Many of the mushrooms in my garden now are also not much larger than a mouse ear. The only reason you will normally notice morels is by knowing to look for them in the first place.
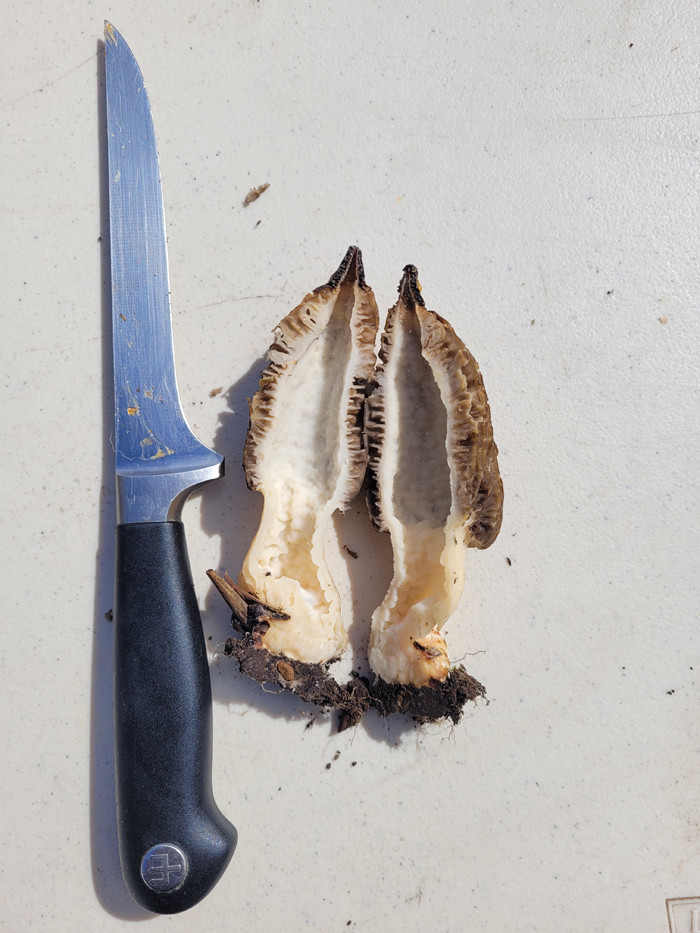
Morels grow quickly from tiny white spots to their full size, in a matter of days or weeks, and are well camouflaged by nature. Even now that I am primed to look for them, the morels are hard to see until they are a certain size. Reading glasses are definitely helpful at this stage.
High morel standards
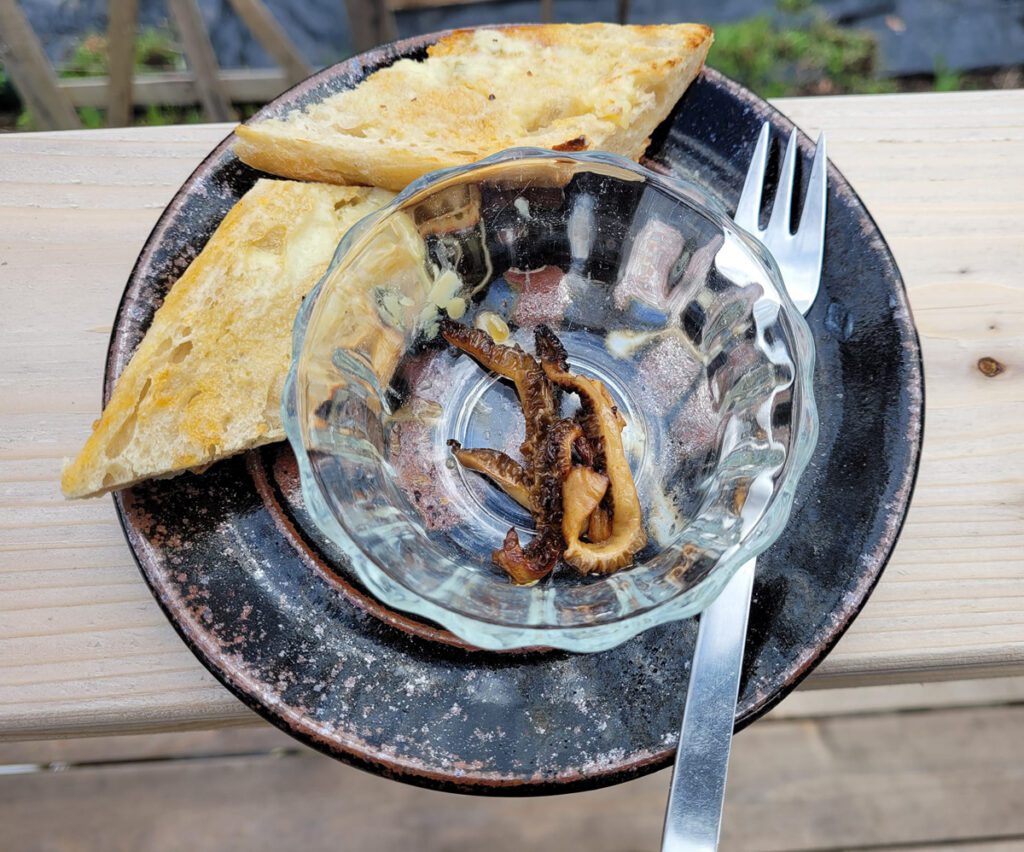
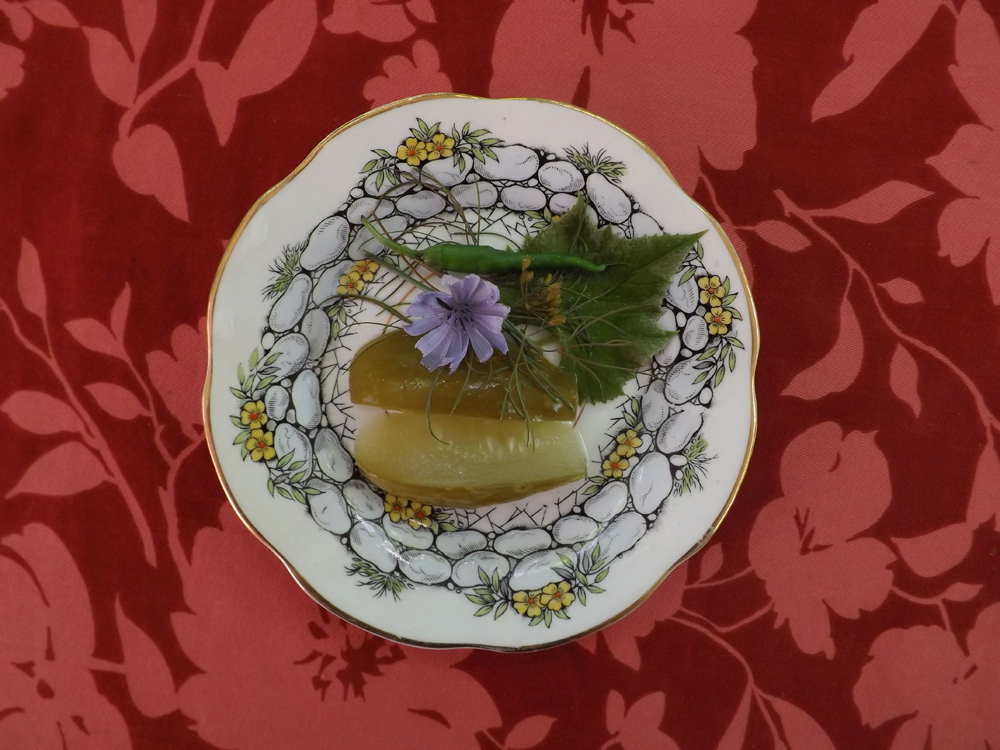
We did of course pick the three largest and most perfect morels and ate them with delight. Immediately, on toasted baguette, and later at dinnertime along with jerk roast brisket. Well, immediately as soon as we confirmed that they were true morels, not false morels.
They were delicious each time. Yummy gourmet mushrooms, directly from the garden, freshly cooked.
By the way, do not eat raw morels, like most edible mushrooms, morels should be cooked. Wild mushrooms almost always require cooking.
I’m trying my hardest not to count my chickens before they are hatched, or to estimate how many pounds of morel mushrooms might grow to maturity.
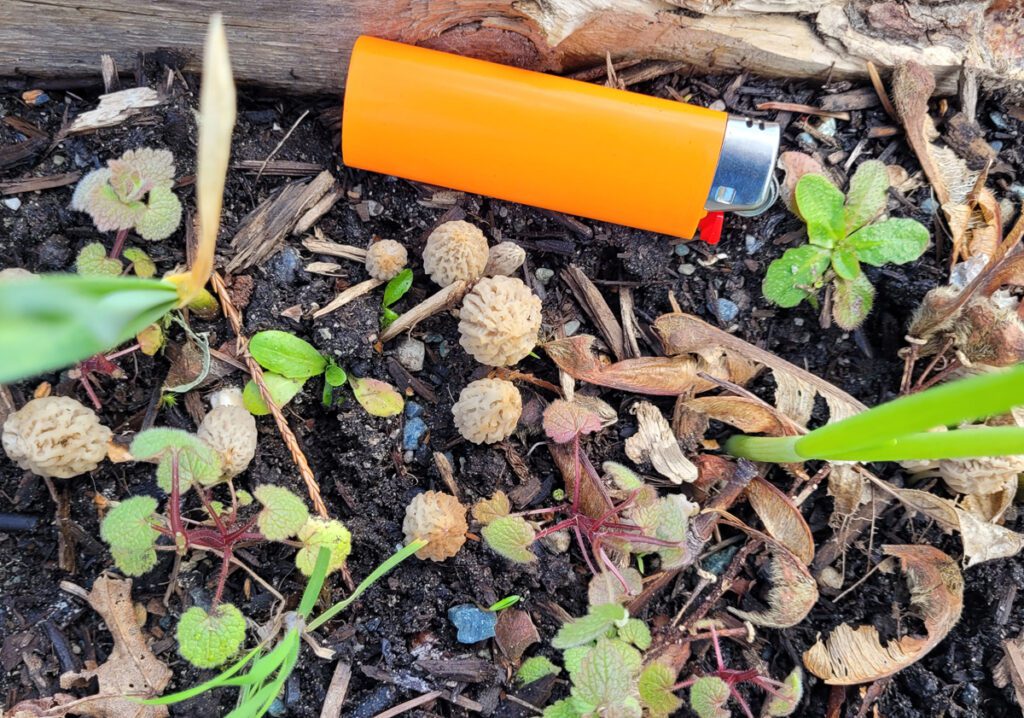
That said, currently, there are 12 raised-bed frames holding several varieties of garlic. Of these boxes, 10 have wild morels growing in them. These boxes were added late last summer, filled with soil from a very large compost box we decommissioned at the same time.
We have been warned by our friend and noted mycologist Bill Jones of Deerholme Farm, that these may be “landscape mushrooms”. It was kind of Bill to take the time to return our call as he is holding one of his popular Mushroom Foraging seminars this weekend. “Landscape mushrooms” are so-called in that they can appear after soil has been moved into a garden. They may produce fruiting bodies in the first year, or perhaps a second, but after that fail to produce. If we want this to continue, it’s going to require some effort.
Cultivation of morels

Naturally, we began reading about morel cultivation immediately. Partly to ensure a good crop from these wild morel mushrooms, but also to learn the right conditions for cultivating a back yard morel habitat.
We had not planned to get into mushroom cultivation. We have looked for mushrooms on the property and missed both oyster mushrooms and chanterelles in the past year. We did mark the spots and the time frame though, and plan to revisit them.
Our chances of success in the space they are growing seem unlikely in the long term, as it is the sunniest part of the yard. We will however do what we can to improve our chances for this year, and immediately sprinkled wood ash on the soil. As soon as the rain stops, we’ll cover the beds with wood chips. These are things we were already planning to do for the garlic, both crops seem to generally like the same soil. Fingers crossed that soil nutrition is a more important factor than the duration of sun exposure in that location. Finally, we will cover the beds with bird netting until the mushrooms are done.
Building a mushroom habitat
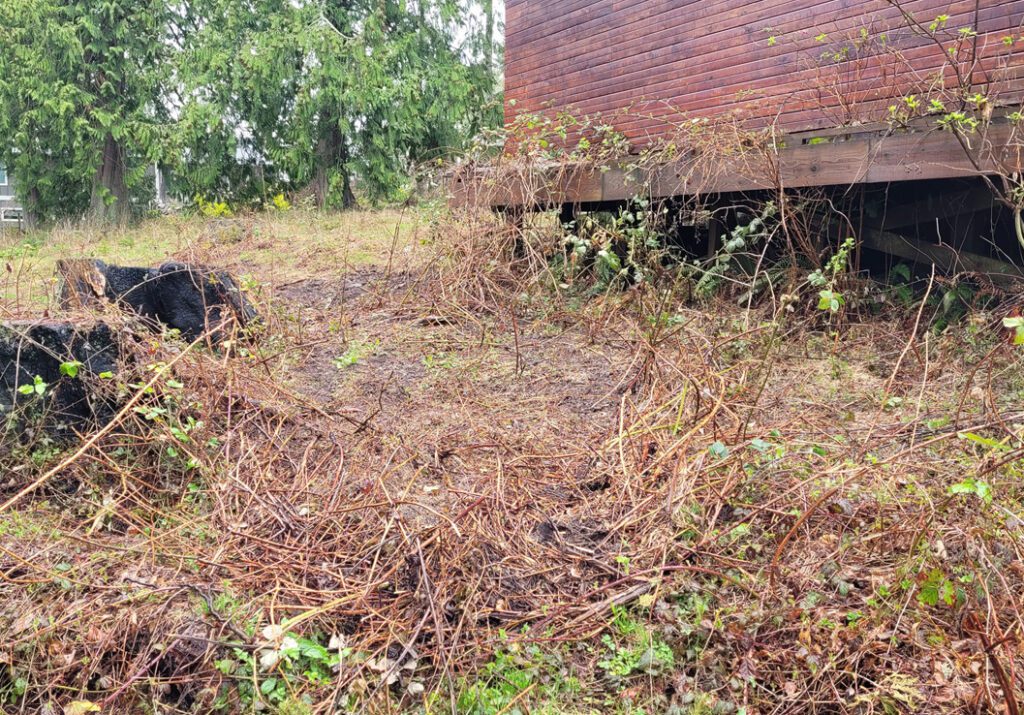
For next year, we are planning to turn the area between two sheds into a mushroom habitat, as it has attributes that provide ideal growing conditions for mushrooms. It has an ideal sun/shade ratio, and soil that is moist, but not soggy. It is also close to the house and on a flat plane, which is rare on this property. Accessibility is also a virtue.
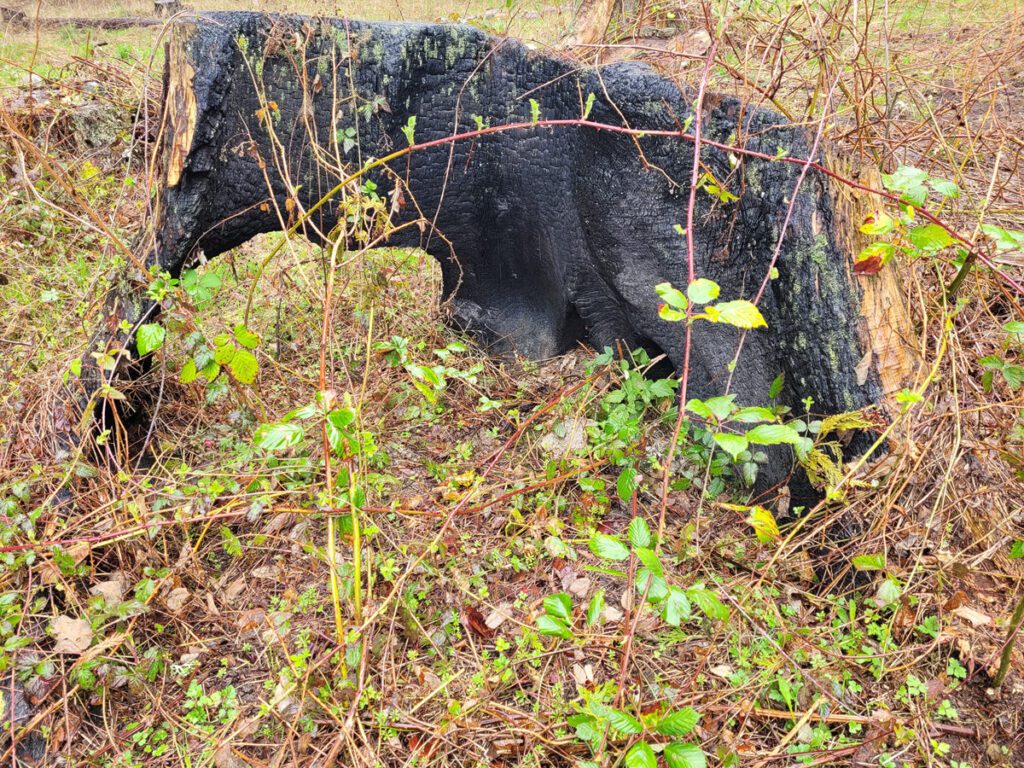
First, we need to remove the invasive Himalayan blackberries that have covered most of the ground there. This was already begun a few weeks ago, the last time we had the tractor here.
Our next task will be to hook the remaining bases of the plants to a chain and pull them out by the roots. Then cover with as much cardboard as we can obtain in large sheets.
Then we will prepare a soil medium designed for morel cultivation, including compost from the same pile that produced the mushrooms so far. One of the things we were lucky to get this spring was a 10-yard pile of wood chips from trees that were taken down by a storm.

We will find a safe way to burn some of these to a degree that will simulate the impact of a forest fire, and make them a good host medium for morels. What we want for the growing medium are equal amounts of peat moss, wood chips, and wood ash, inoculated with morel spawn.
Once this soil is prepared, we will pack it inside and around the tree stumps that are in our chosen mushroom garden habitat.
Making our own morel mushroom kit
It is doubtful that we would try this if we had to buy the morel mycelium. Given that we have our own morel mushrooms, it’s a lot easier and more fun to make our own growth kit. Using morel spores from our own mushrooms and the spore slurry method, we hope to establish a successful mushroom garden. At the very least, we hope to have a consistent personal supply of fresh morel mushrooms in season. We don’t anticipate going into anything like “commercial production”, but are hopeful that this will add a new dimension to our market garden plans.
Basically, you make a cold tea using distilled water that has been boiled, with molasses and a bit of salt added, and then cooled. Once the water is cooled to room temperature, add the spore head of the mushroom(s), and let the spore culture sit in a dark place for two days. Finally, strain this through a clean cloth and use the liquid to water the prepared mushroom habitat.
Propagating and waiting
Once we have built our soil and inoculated it with the spore culture, it will be time to wait and see what happens. If this is not successful by June, I’ll keep some dried morels on hand to re-inoculate towards the end of August when the rains begin again to give them the best start for next year. July and early August here tend towards drought, which is not ideal for mushroom cultivation. Late summer brings the beginning of rain, while it is still warm enough to establish the spores before the cold of winter begins.
There is clearly something about this site that has been appealing to at least 3 species of edible and culinary desirable mushrooms. I appreciate the gifts of random favor and believe in helping such things to flourish.
There will be updates on the mushroom garden as we build it. Follow this site for notes on our successes and setbacks.